Showing posts with label Subway Tile. Show all posts

Friday, January 13, 2017

Bathroom Shower Tile

So months and months and many more months ago, when I was pregnant I knew that before the boys arrived I would want to retile the bathroom.  We had this plastic surround that would always get grimy and gross, so I wanted something fresh and clean.  This is what we started with:


and after some tile, a little grout and a new shower head:
We bought the subway tile from Menards, got the tile for the niche, along with two preformed niches from The Tile Shop and bought the shower head set from Home Depot.  I'm in LOVE!
We did our usual thing and wrote inside the wall to mark the occasion and memory.
Once the walls were up we started tiling.  Getting the niche done first, followed by the subway tile.
Followed by grout.
We ended up with a decent size gap between the top piece of tile and the ceiling. 
Like the three little bears it was too small for tile, to big for grout so....
We added a piece of quarter round to the top, caulked and painted it the same color as the ceiling.
Just perfect.
We love the showerhead, but it didn't come with a handheld attachment so we bough this one and it works great for giving the boys and the dogs baths and matches great with the showerhead kit we bought..


With all of our other bathroom projects, we always wanted to do a niche to have a place to store all of our things, but when it came down to it we never did, thinking it would be too much work or too expensive.  It did cost a little more, and take a little extra time, but it was SO worth it.
I found this little guy at Steins last fall.  It is called an "air plant" and literally you do NOTHING to it.  Set it and forget it.  No water, no dirt, nothing.  I found the little pot at Steins too, plopped the plant inside and put it in our bathroom.  The steam from showers helps it and I have not watered it at all!  Maybe I've found a plant that I can actually keep alive.


Thursday, May 16, 2013

Bathroom Tile Love


So...the hubs and I spent a good portion of our vacation huddled and cramped in a small bathroom tiling our shower.  The hubs was the master cutter and I laid the tile.  We laid the subway tile up to the window then had to work on getting the window completed before we could moved forward with the rest.  
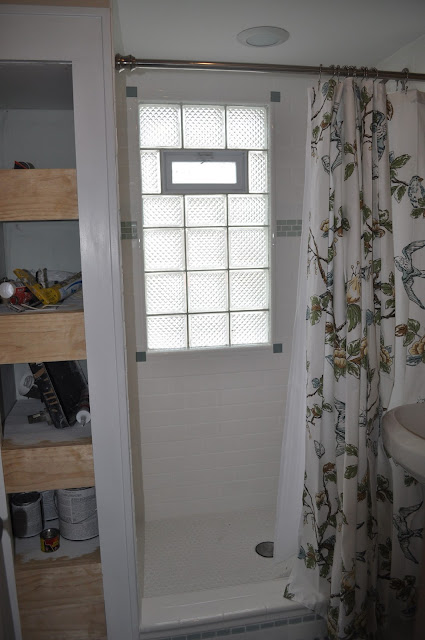
After spending WAY too many hours and taking WAY too many Ibuprofen for the back pain we ended up with a frickn' beautiful tile job that we are pretty proud of!

bathroom, reno, subway tile, sea glass tile, glass tile, white grout, grout, glass block window,

bathroom, reno, subway tile, sea glass tile, glass tile, white grout, grout, glass block window,
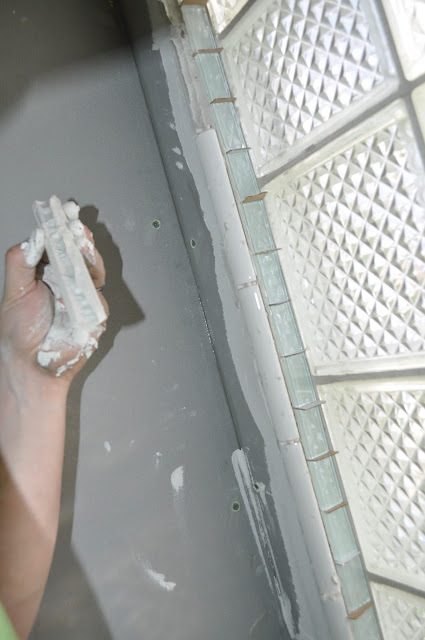
The hubs is a perfectionist and had a difficult time with placing the sea glass tile inside the window.  The spacers we had were too wide so we used cardboard strips in between each tile in order to give it the right space that it needed.  The bottom of the window we the hubs pitched the mortar and tile in such a way that if any water that gets in the window will just drain down the wall and into the shower pan.

bathroom, reno, subway tile, sea glass tile, glass tile, white grout, grout, glass block window,

We tossed around tons of ideas for how to finish the window and once we agreed on the sea glass inside the window, we weren't sure how to frame out the window.  I looked all over Pinterest and couldn't really find anything that helped, so the hubs and I jumped in the car and went to Home Depot to figure it out.  We found these which I loved right away and ended up using them to frame out the window:

Daltile Semi Gloss 3/4 in. x 6 in. White Ceramic Quarter-Round Trim Wall Tile

The hubs then laid them around the edge of the window, tweaking and making adjustments until they were set and he felt comfortable with how they looked.  On each side of the window he started out by finding the middle then worked his way out and made any necessary cuts.

bathroom, reno, subway tile, sea glass tile, glass tile, white grout, grout, glass block window, home depot
For the corners of the window frame we ended up using a square blue-ish piece of glass tile which worked out perfect!

bathroom, reno, subway tile, sea glass tile, glass tile, white grout, grout, glass block window,

bathroom, reno, subway tile, sea glass tile, glass tile, white grout, grout, glass block window,

bathroom, reno, subway tile, sea glass tile, glass tile, white grout, grout, glass block window,

As soon as the bottom of the window was done I was SUPER confident on how it was going to turn out in the end and I was so excited!

bathroom, reno, subway tile, sea glass tile, glass tile, white grout, grout, glass block window,

bathroom, reno, subway tile, sea glass tile, glass tile, white grout, grout, glass block window,
Three long, agonizing hours later we had the window done....(we DID NOT expect the window to take that long at all...) but it was SO worth it! 

bathroom, reno, subway tile, sea glass tile, glass tile, white grout, grout, glass block window,
After the window was done we were clear for take off to finish the rest of the walls and began the process of laying all the tile.  We actually forgot to lay the sea glass border on the right side of the below picture initially (that was the first wall that we did the border on) and ended up popping out the subway tile and laying the sea glass in.  At first we talked about whether it would be worth it to pop out the subway tile and holy crap are we happy we did.  It adds just that little bit of character that we were looking for!

bathroom, reno, subway tile, sea glass tile, glass tile, white grout, grout, glass block window,

bathroom, reno, subway tile, sea glass tile, glass tile, white grout, grout, glass block window,

bathroom, reno, subway tile, sea glass tile, glass tile, white grout, grout, glass block window,


bathroom, reno, subway tile, sea glass tile, glass tile, white grout, grout, glass block window,


bathroom, reno, subway tile, sea glass tile, glass tile, white grout, grout, glass block window,

We absolutely love the way the hex tile, mixed with the subway tile give the bathroom a vintage feel!

bathroom, reno, subway tile, sea glass tile, glass tile, white grout, grout, glass block window, hex tile
Once the tile was all set and dried we got to grouting the walls and floors, which I found to be kind of fun! Who knew what a difference a little grout could make!  In this post we originally talked about using a dark brown grout on the floors and white grout on the walls, but once we were done tiling opted to use white grout for all the tile to give it a seamless feel.  We also felt like using white grout all around would make the room appear to be bigger, which is definitely a decision that we were happy we went with.

bathroom, reno, subway tile, sea glass tile, glass tile, white grout, grout, glass block window, hex tile

bathroom, reno, subway tile, sea glass tile, glass tile, white grout, grout, glass block window, hex tile


bathroom, reno, subway tile, sea glass tile, glass tile, white grout, grout, glass block window, hex tile

bathroom, reno, subway tile, sea glass tile, glass tile, white grout, grout, glass block window, hex tile
So to do a little side by side comparison of how well tile can really finish and complete a room:

bathroom, reno, subway tile, sea glass tile, glass tile, white grout, grout, glass block window, hex tile

bathroom, reno, subway tile, sea glass tile, glass tile, white grout, grout, glass block window, hex tile


And after a little tile:


bathroom, reno, subway tile, sea glass tile, glass tile, white grout, grout, glass block window, hex tile

bathroom, reno, subway tile, sea glass tile, glass tile, white grout, grout, glass block window, hex tile

bathroom, reno, subway tile, sea glass tile, glass tile, white grout, grout, glass block window, hex tile

bathroom, reno, subway tile, sea glass tile, glass tile, white grout, grout, glass block window, hex tile

bathroom, reno, subway tile, sea glass tile, glass tile, white grout, grout, glass block window, hex tile


We still need to seal the grout, which is something I'll be doing this weekend, but we are so happy with how things are turning out!!

Happy tiling!!

Wednesday, April 17, 2013

Crack is Whack

During the tail end of our kitchen reno, one of the finishing details once we got the counters installed and back splash tiled was caulking all the corners.  There is something about our house and caulk... that no matter what kind of caulk we use we start with something like this:

caulking counters, tile, kitchen, caulk, LOCTITE

but after a few months have this:

caulking counters, tile, kitchen, caulk, LOCTITE

and this...

caulking counters, tile, kitchen, caulk, LOCTITE
annndddd this.....

caulking counters, tile, kitchen, caulk, LOCTITE


I'm guessing you get the hint. IT CRACKED!!!!!!! Which is frustrating to say the least and this has been bothering me for a while now.  I feel like no matter what we use it always ends up cracking.  Usually small projects like this I tend to put on the back burner until randomly one day, usually when I have 1,000 other things to do, say "hey I should be helping the hubs' with fill in the blank but I'm having a "squirrel" moment and I'm going to caulk the kitchen!"

Like I said earlier, we've tried almost every type of caulk and nothing seemed to be working.  After doing a little research at my local Menards I decided to try LOCTITE PL S40 Polyurethane Sealant Window, Door and Siding Caulk.  It's engineered to form long-lasting seals as well as expand and contact with the material it's used with.  

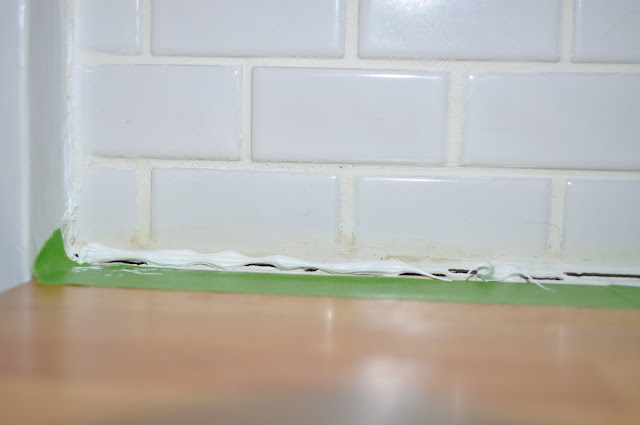
I started out by using green Frog Tape to tape off the area that I wanted to caulk and with caulk gun in hand, locked and loaded I got started.  

caulking counters, tile, kitchen, caulk, LOCTITE

caulking counters, tile, kitchen, caulk, LOCTITE
Mind me I have never used this type of caulk before, but holy crap this stuff was a pain in the ass to use.  It says to use gloves to avoid skin contact.  I tried using gloves and the only thing that happened was that the gloves got stuck trying to spread the caulk, thus making a bigger mess...so off came the gloves.  By the time the project was done I had caulk on my hands, which took a week to get off fully, on my camera, my phone, the stove, the counter, the sink faucet, door handles, clothes, hair, remote, keyboard among probably many other places in my house that I haven't noticed yet!

Another thing was that this caulk was super difficult to squeeze out with the caulk gun.  I'm not the weakest person in the world and I would use every ounce of muscle in my arms and only get out a drop.  I know I had cut the hole big enough on the tube so the only thing I can think of is that I had a dud of a tube of caulk...unless this is how difficult this type of caulk really is to get out??

What felt like forever later, I was done and able to start pulling off the Frog Tape!!  It was awesome...It was nerve wrecking (like an unveiling of artwork from behind a sheet)...but it turned out great!

caulking counters, tile, kitchen, caulk, LOCTITE

caulking counters, tile, kitchen, caulk, LOCTITE

caulking counters, tile, kitchen, caulk, LOCTITE.

..and presto I went from this:

caulking counters, tile, kitchen, caulk, LOCTITE

caulking counters, tile, kitchen, caulk, LOCTITE

to this awesomeness:  

caulking counters, tile, kitchen, caulk, LOCTITE

caulking counters, tile, kitchen, caulk, LOCTITE

This project was another one of those projects that I put off for a while just because I thought it was going to be a pain in the ass and I was right, it was... but in the end it was totally worth it!!