Showing posts with label Stairs. Show all posts

Friday, April 10, 2015

Light and Bright

The door leading down to our basement and the door right next to it leads out to the garage.  I cannot even begin to count how many times people have opened the basement door all like, "okay I'm leaving, see you later", until they realize they would be going down to our basement.

door, glass door, menards, diy, installation, before and after, basement project, kitchen project, kitchen, basement

I'm guilty of doing that a couple times myself. The entire time the hubs and I were sprucing up our basement and stairway leading down to our basement I knew that I wanted a different door for that reason and I feel like it would open up our kitchen area.  We did the same thing with our old house and loved how it turned out, so we figured why not?

 When we were thinking of a paint color I knew just what I wanted.  I wanted to bring a little bit of the basement up to the kitchen so we decided to use the same color that we painted the basement ceiling.  After some hesitation from the hubs, I took care of it like I do most of our painting projects....while he was at work and it turned out great!

door, glass door, menards, diy, installation, before and after, basement project, kitchen project, kitchen, basement

We bought a pre-primed, pre-hung door (this one, but primed) from Menards and brought it back home to get it painted and installed.    It was relatively easy to put up, the hubs managed to get it done by himself without any causalities.  We would totally recommend going with a pre-hung door, especially if you plan on switching out the trim or repainting only because then your almost guaranteed for a perfect fit.  That was our mistake with our previous house was not purchasing a pre-hung, and we noticed that as the house expanded the door would not stay closed.
**FYI we had to special order this door and it took about 10-14 days to have it delivered to the store**
This is what the door looks like before I got my hands on it...The panes of glass have plastic on them and the entire door is primed, which made it easy for this project to be done without a lot of hassle and cutting in!

door, glass door, menards, diy, installation, before and after, basement project, kitchen project, kitchen, basement

I got the door finished, two coats on each side, and once it was installed the hubs installed the door knob.  We just got a standard brushed nickel knob.  We are slowly but surely changing all of them out too!

door, glass door, menards, diy, installation, before and after, basement project, kitchen project, kitchen, basement

From there we were ready to rock and take off the paint coated plastic.  We recommend using a sharp knife or blade and to go around the edges of each pain.  That will prevent the paint on the plastic from chipping EVERYWHERE and the sheets come off almost in one piece.

door, glass door, menards, diy, installation, before and after, basement project, kitchen project, kitchen, basement

door, glass door, menards, diy, installation, before and after, basement project, kitchen project, kitchen, basement

Needless to say we love how it turned out and it opens up the kitchen way more than we thought!  Now all we have to do is replace the other doors and paint 1,000 miles worth of trim...

Thursday, February 26, 2015

Installing a Runner

We officially have a runner installed and are in LOVE.  This project took about an hour from start to finish and the difference it makes is huge!


runner, overstock, runner installation, diy, easy, before and after, project, bostitch, staple gun, carpet pad, one hour, before, after, before and after, basement, hallway, stairs

runner, overstock, runner installation, diy, easy, before and after, project, bostitch, staple gun, carpet pad, one hour, before, after, before and after, basement, hallway, stairs

We purchased two of them from here for the project. We also purchased a Bostitch Electric Staple Gun...by the way works AMAZING.  We also used no slip under carpet padding and no slip carpet tape.

runner, overstock, runner installation, diy, easy, before and after, project, bostitch, staple gun, carpet pad, one hour, before, after, before and after, basement, hallway, stairs


We measured out the middle and cut out strips of tape to place on the treads.

runner, overstock, runner installation, diy, easy, before and after, project, bostitch, staple gun, carpet pad, one hour, before, after, before and after, basement, hallway, stairs

Two per tread.  The tape helped keep the carpet pad and the edges of the runner in place.

runner, overstock, runner installation, diy, easy, before and after, project, bostitch, staple gun, carpet pad, one hour, before, after, before and after, basement, hallway, stairs


The hubby then applied the no slip under carpet padding down the entire set of stairs.  The double sided tape helped keep it in place and then came the fun part....runner installation.

runner, overstock, runner installation, diy, easy, before and after, project, bostitch, staple gun, carpet pad, one hour, before, after, before and after, basement, hallway, stairs

This project was ridiculously easy and made a HUGE difference.  All he did was make sure the runner was evenly placed and got to town stapling it in.

***One word of advise:  We used a permanent marker and covered the top portion of the staples black.  That would help hide them within the runner.  If you don't have any black in your runner try to match up the color of the permanent marker with a color in your runner.

runner, overstock, runner installation, diy, easy, before and after, project, bostitch, staple gun, carpet pad, one hour, before, after, before and after, basement, hallway, stairs

When it came to transitioning from the first runner into the second runner we made sure to have the end of the first runner and the beginning of the second come together under the lip where the tread meets the riser.

The material for the runner was SUPER easy to cut, didn't fray much at all and was easy to work with.

runner, overstock, runner installation, diy, easy, before and after, project, bostitch, staple gun, carpet pad, one hour, before, after, before and after, basement, hallway, stairs


See you can't even see the transition between the two runners!!

runner, overstock, runner installation, diy, easy, before and after, project, bostitch, staple gun, carpet pad, one hour, before, after, before and after, basement, hallway, stairs


So far so good, we have had it installed for a few weeks now and haven't had any issues with the runner.  It's definitely dog approved, they love running up and down the stairs and seem to have no problem with it! 

When we moved in this is what we started with:

runner, overstock, runner installation, diy, easy, before and after, project, bostitch, staple gun, carpet pad, one hour, before, after, before and after, basement, hallway, stairs

And once I was sick and tired of it I went to town with my paint brush:


runner, overstock, runner installation, diy, easy, before and after, project, bostitch, staple gun, carpet pad, one hour, before, after, before and after, basement, hallway, stairs, paint, painting, treads, riser

And we could have just been content, but that's not how we roll.  Things are finally taking shape:

runner, overstock, runner installation, diy, easy, before and after, project, bostitch, staple gun, carpet pad, one hour, before, after, before and after, basement, hallway, stairs

We are in love with how this has turned out!!!

Tuesday, January 27, 2015

Basement Stairs

When in doubt, paint. 
 
It has been proven on numerous occasions (here and here) that paint can completely transform a room, hallway or staircase in this case for barely any cost, but just a lot of patience.

For instance with our basement, we started out with this:

stairs, painting, basement, basement stairs, treads, risers, runner, lighting, paint, before, after

It looks like someone got a little angry at the risers... 
 
stairs, painting, basement, basement stairs, treads, risers, runner, lighting, paint, before, after

Regardless I got out my brush and went to town.

stairs, painting, basement, basement stairs, treads, risers, runner, lighting, paint

And after about five seven coats of paint and a TON of patience this is where we are at:
 
 
I mixed up my paints and started painting the opposite treads with it.  Naturally it ended up being the wrong color, my luck, but I'm kind of digging it.
 
 
Then after himming and hawing over this light for a few months we took all of our rebates and gift cards and brought it home and got it installed asap!
 
lighting, menards, pendant lighting, stained glass, cream, paint, diy, decor, decorations, bathroom, bathroom lighting, vanity lighting, vanity
 
We love how much it brightens things up... 
So while our progress is slow....at least we are making some. 

 
I think we have Mae's approval.

 
Right now we are on the hunt for a runner to install.
We have a few that we are looking at but are indecisive...help!
stairs, painting, basement, basement stairs, treads, risers, runner, lighting, paint, runner, overstock

stairs, painting, basement, basement stairs, treads, risers, runner, lighting, paint, runner, diy, overstock
 
stairs, painting, basement, basement stairs, treads, risers, runner, lighting, paint, runner, diy, overstock

We also have plans to add a French door at the top of the stairs to open things up between that room and our kitchen.  We loved how it looked at our old house and how much larger it made the room look, so we figured we would do the same thing.
To finish things up the hubs' DIY'd something similar to this: (blog post and pictures to follow)

stairs, painting, basement, basement stairs, treads, risers, runner, lighting, paint, diy, handrail

For the dramatic change, here is what we started with:
 
stairs, painting, basement, basement stairs, treads, risers, runner, lighting, paint, before, after

And here is after a few coats of paint:
 

Next step: Buy a runner and install it.  Wish us luck!

Monday, September 29, 2014

Basement Project Stage 1

When we first bought our house we loved the idea of having a partially finished basement, especially since we couldn't really of made one work with our old house. The thought of being able to eventually host parties and have another place to relax was awesome, the only thing stopping us was this:

basement, menards, paint, organization, rec room, peel and stick tile, diy, basement project, finished basement

Hot mess, I know. I was reminded of it several times a week when I would have to go downstairs to do the laundry and have to walk pass it.

I woke up determined to get that room cleared out, I meant I was determined to get the hubs to help me take care of it..  So after a few hours, we managed to move, organization and throw away a ton of stuff, which then left the room looking much better:

basement, menards, paint, organization, rec room, peel and stick tile, diy, basement project, finished basement

Then we got busy painting the walls from the salmon-ey color to Dutch Boy 'Water Fowl' (C15-3):

basement, menards, paint, organization, rec room, peel and stick tile, diy, basement project, finished basement

And you're probably wondering why we painted the walls before installing the ceiling.  Well we do things when we have time for them and frankly installing a ceiling didn't fit into our time frame at the moment, plus we were not sure exactly what type of ceiling we wanted.

All the holes in the trim were filled, sanded and a nice coat of glossy white paint sealed the deal.

basement, menards, paint, organization, rec room, peel and stick tile, diy, basement project, finished basement

From there we had plans to work on the vinyl flooring.  It is beat up and desperately needs to be replaced.  We wouldn't normally go with peel and stick tile, but for this area we didn't want to fork out a ton of money right now and wanted a temporary fix.  So off to our second home Menards we went because I really wanted this vinyl flooring:

sheet vinyl, flooring, menards

But it can only be ordered in sheets and cannot be custom cut.  With that said we would have ended up wasting money, plus we realized the color wouldn't have matched. 

Round two. Back at Menards looking for something reasonable and we stumbled upon pre cut rolls of vinyl flooring for $20 each and we found two that matched thinking it would be perfect.  We brought them home and that was epic fail #2, the flooring was WAY too dark.  I took a picture, but accidently deleted it.  Trust me, way too dark.

After that fail, we went back, returned the rolls and found this tile:

armstrong, peel and stick tile, tile, basement, flooring

armstrong, peel and stick tile, tile
We were kind of hoping to crank out this project, get the quarter round down and check off another thing on our list, but the thing about peel and stick tile is the only way it can work is if it sticks.  The hubs laid down one tile and it popped right back up. (Yes we took off the backing on it too, so it wasn't operator error).

So back to the store we went...again.  Crappy peel and stick tile returned and we raised the white flag.  We decided that the gods were working against us and took it as a sign to take a break and not worry about the floors.

We were able to make some progress besides the fact that we totally failed the floor and managed to get some can lights installed.

What's next?  Drywall.  Even a healthy Emily is not strong enough to help with the drywall, so we will have to enlist the help of a friend or two to assist the hubs in finishing that part.


Friday, June 6, 2014

Settling In

The day we moved in was crazy.  Boxes flying, newspaper everywhere, furniture randomly all over the house.  We manage to get our bedroom and the living room the most functional, and over the past few weeks we've been unpacking, putting away and trying, TRYING to get things in order!  We are loving the layout of the house and totally loving how our furniture works with the flow!


While we still have to figure things out, here is where we're at so far!

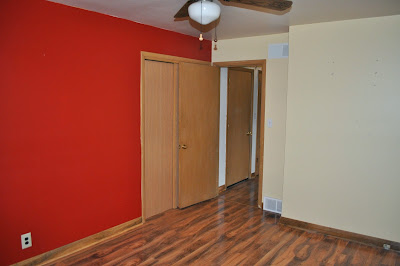
Our office was red, had a decal on the wall and seemed kind of bland.

kitchen, bathroom, new house, moving in, hallway, living room, outside, bedrooms, basement, officer, porch, second house, windows, dining room

kitchen, bathroom, new house, moving in, hallway, living room, outside, bedrooms, basement, officer, porch, second house, windows, dining room

And after a little paint and furniture:

kitchen, bathroom, new house, moving in, hallway, living room, outside, bedrooms, basement, officer, porch, second house, windows, dining room

kitchen, bathroom, new house, moving in, hallway, living room, outside, bedrooms, basement, officer, porch, second house, windows, dining room

When we moved in we had this:

kitchen, bathroom, new house, moving in, hallway, living room, outside, bedrooms, basement, officer, porch, second house, windows, dining room

After some paint and getting our things in place we have this:

kitchen, bathroom, new house, moving in, hallway, living room, outside, bedrooms, basement, officer, porch, second house, windows, dining room

Painting the soffit made a HUGE difference with making the room look SO much bigger and it feels good to have a starter kitchen that we don't HAVE to completely gut right away!

Here is our dining room before we got our hands on it:

kitchen, bathroom, new house, moving in, hallway, living room, outside, bedrooms, basement, officer, porch, second house, windows, dining room

And all we have done is paint, but it seems a lot less "brown".  The crazy thing:  Our dining room is all the same color, no accent wall, that's just how the lighting works in our house.


Here is our living room before we painted and added our furniture:

kitchen, bathroom, new house, moving in, hallway, living room, outside, bedrooms, basement, officer, porch, second house, windows, dining room

We have been spending most of our time in this room and after moving things around managed to get it functional.  We love how comfortable this room is now!

kitchen, bathroom, new house, moving in, hallway, living room, outside, bedrooms, basement, officer, porch, second house, windows, dining room

kitchen, bathroom, new house, moving in, hallway, living room, outside, bedrooms, basement, officer, porch, second house, windows, dining room

Our bathroom.  Here is what we started with:

kitchen, bathroom, new house, moving in, hallway, living room, outside, bedrooms, basement, officer, porch, second house, windows, dining room

We have SO many plans for this room but while we figure out our game plan here is our bathroom once we added our little touches to it:

kitchen, bathroom, new house, moving in, hallway, living room, outside, bedrooms, basement, officer, porch, second house, windows, dining room

The same goes for the half-bath:

kitchen, bathroom, new house, moving in, hallway, living room, outside, bedrooms, basement, officer, porch, second house, windows, dining room

I threw down a bath mat and called it a day. Bam. Done.  At least for now.

I had big plans to get all the wallpaper down and get this room painted in time.

kitchen, bathroom, new house, moving in, hallway, living room, outside, bedrooms, basement, officer, porch, second house, windows, dining room

But that didn't happen and now this room is our catch-all room.  We haven't done anything and I just close the door and pretend it looks done inside.  Maybe one of these days I'll have the energy to tackle it.

kitchen, bathroom, new house, moving in, hallway, living room, outside, bedrooms, basement, officer, porch, second house, windows, dining room

Our bedroom was kind of bland.  We didn't like the color and even though the curtains worked for the previous owners, they weren't really our style.

kitchen, bathroom, new house, moving in, hallway, living room, outside, bedrooms, basement, officer, porch, second house, windows, dining room

 After some painting and some blinds, we did manage to get our room together and love how cozy it is.

kitchen, bathroom, new house, moving in, hallway, living room, outside, bedrooms, basement, officer, porch, second house, windows, dining room

kitchen, bathroom, new house, moving in, hallway, living room, outside, bedrooms, basement, officer, porch, second house, windows, dining room

I was NOT digging the "blue horse room".  The first thing I peeled off the walls were a bunch of horse decals that were everywhere...

kitchen, bathroom, new house, moving in, hallway, living room, outside, bedrooms, basement, officer, porch, second house, windows, dining room

And after a few coats of paint and our attempt to get something kind of set up:

kitchen, bathroom, new house, moving in, hallway, living room, outside, bedrooms, basement, officer, porch, second house, windows, dining room

The finished portion of the basement is a hot mess.  Totally looks like a tornado went through but we have plans to figure out what we're keeping, donating and tossing.

kitchen, bathroom, new house, moving in, hallway, living room, outside, bedrooms, basement, officer, porch, second house, windows, dining room

Moving on to the hubs' work area in the basement, we pretty much just dumped our boxes and moved on.

kitchen, bathroom, new house, moving in, hallway, living room, outside, bedrooms, basement, officer, porch, second house, windows, dining room

 I haven't seen any zombies come out of the crawl space yet, but I'm still on guard...

kitchen, bathroom, new house, moving in, hallway, living room, outside, bedrooms, basement, officer, porch, second house, windows, dining room

Right now my sweet fur baby is trying her hardest for me to take her out so I'm off to enjoy the beautiful weather!!