Showing posts with label Bathroom. Show all posts

Friday, January 13, 2017

Bathroom Shower Tile

So months and months and many more months ago, when I was pregnant I knew that before the boys arrived I would want to retile the bathroom.  We had this plastic surround that would always get grimy and gross, so I wanted something fresh and clean.  This is what we started with:


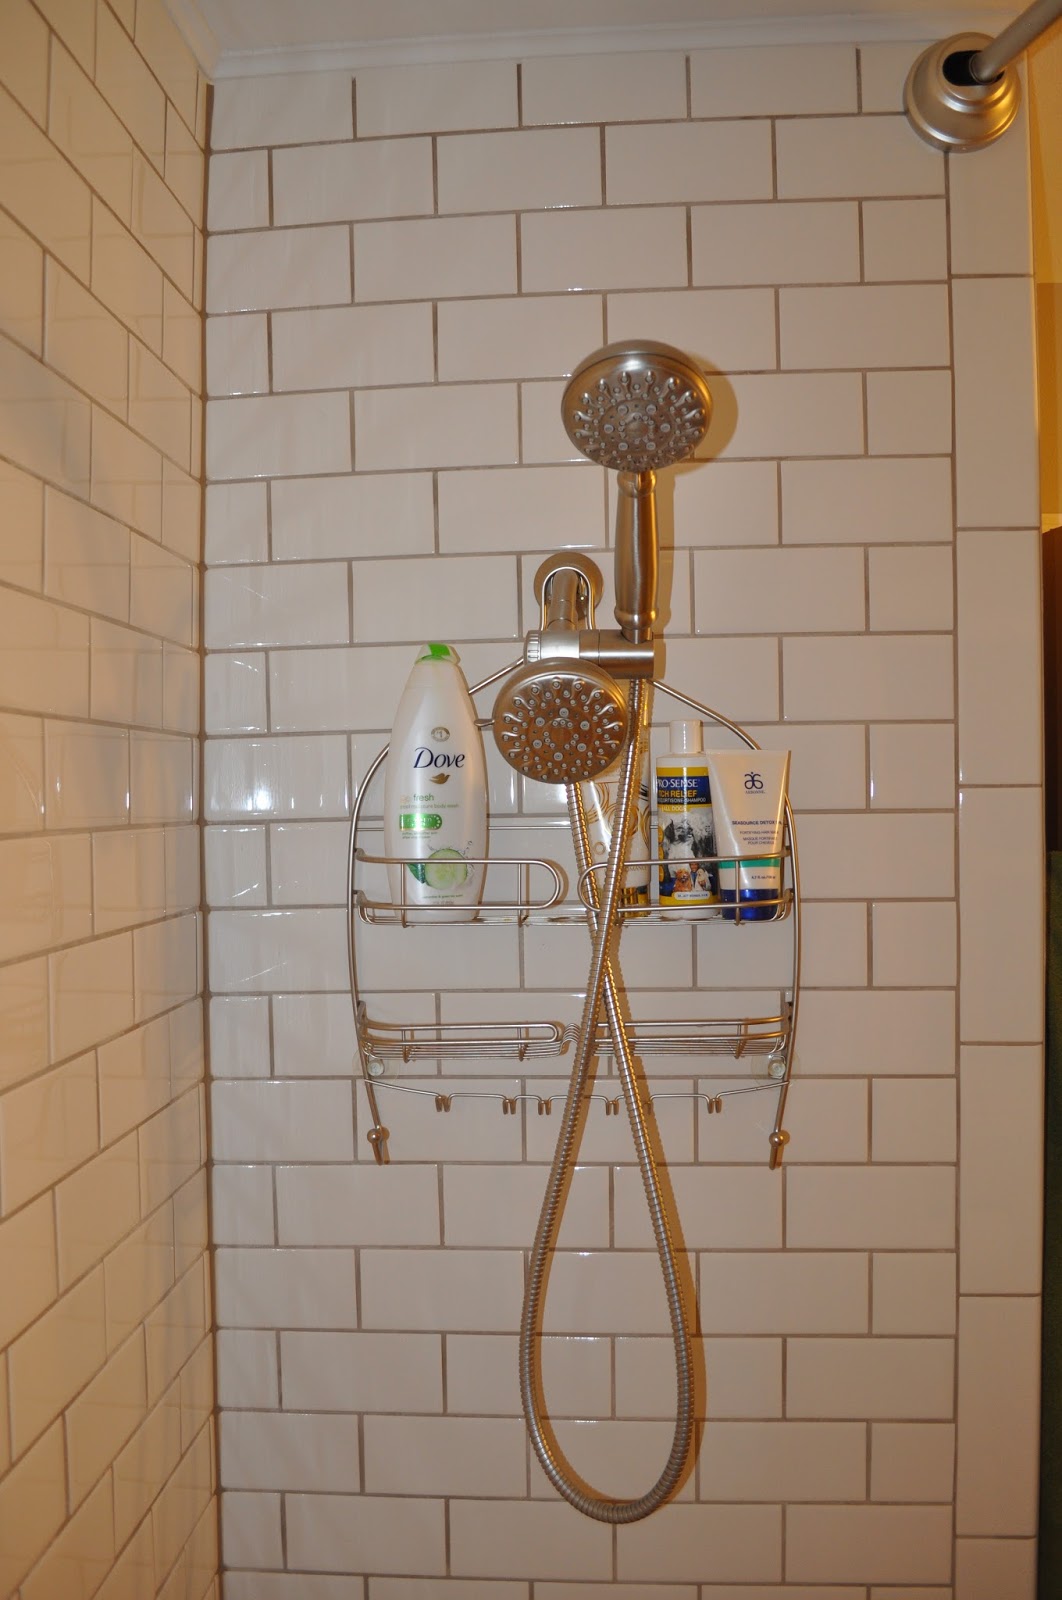
and after some tile, a little grout and a new shower head:
We bought the subway tile from Menards, got the tile for the niche, along with two preformed niches from The Tile Shop and bought the shower head set from Home Depot.  I'm in LOVE!
We did our usual thing and wrote inside the wall to mark the occasion and memory.
Once the walls were up we started tiling.  Getting the niche done first, followed by the subway tile.
Followed by grout.
We ended up with a decent size gap between the top piece of tile and the ceiling. 
Like the three little bears it was too small for tile, to big for grout so....
We added a piece of quarter round to the top, caulked and painted it the same color as the ceiling.
Just perfect.
We love the showerhead, but it didn't come with a handheld attachment so we bough this one and it works great for giving the boys and the dogs baths and matches great with the showerhead kit we bought..


With all of our other bathroom projects, we always wanted to do a niche to have a place to store all of our things, but when it came down to it we never did, thinking it would be too much work or too expensive.  It did cost a little more, and take a little extra time, but it was SO worth it.
I found this little guy at Steins last fall.  It is called an "air plant" and literally you do NOTHING to it.  Set it and forget it.  No water, no dirt, nothing.  I found the little pot at Steins too, plopped the plant inside and put it in our bathroom.  The steam from showers helps it and I have not watered it at all!  Maybe I've found a plant that I can actually keep alive.


Tuesday, January 19, 2016

Bathroom Redo

Our bathroom vanity and flooring was dated, dirty and overdue for a redo.


So a redo it got.  

bathroom, vanity, redo, reno, recycled glass counter, bathroom vanity, bathroom counter, home depot, menards, knobs, tile, lowes, flooring, homelux, underlayment

We went with a recycled glass counter because I love the materials used and the uniqueness of it.  I love the strength of the counter and the price is equal or closely comparable with quartz or granite.

mcdermott top shop, counter, home depot, recycled glass counter, recycled glass, bathroom reno, bathroom redo, budget diy, diy, vanity, flooring

We ordered it through Home Depot and McDermott Top Shop came out and installed it.  I am more of a diy-er, love finding reusable products that are easy, budget friendly and typically something the hubby and I can handle, but this purchase was definitely worth it!

mcdermott top shop, counter, home depot, recycled glass counter, recycled glass, bathroom reno, bathroom redo, budget diy, diy, vanity, flooring, painting, flooring, tile, installation

We purchased this sink and this faucet.  Love both.

Realizing that counter would not match with the existing job that I did on the vanity, I opted to paint the vanity a mint, (the same color we painted the basement ceiling), transforming it...

From this:

bathroom, vaniety, minwax, stain, elbow grease, polyshades, polyurethane, budget, project, before and after, world market, mirror, lighting

To this:

bathroom, vanity, redo, reno, recycled glass counter, bathroom vanity, bathroom counter, home depot, menards, knobs, tile, lowes, flooring, homelux, underlayment, before and after, before, after

bathroom, vanity, redo, reno, recycled glass counter, bathroom vanity, bathroom counter, home depot, menards, knobs, tile, lowes, flooring, homelux, underlayment, before and after, before, after

Since the paint was a satin base, I applied polyurethane over the top of it, two coats, lightly sanding in between and am loving it!

So fresh and so clean.

I kept the hardware the same color because it matches everything else.

If you didn't notice from the pictures above, we also decided to rip out our outdated, dirty flooring and slap down some tile.  One would think that would be easy....five layers of flooring, and a few hours later we managed to get almost all of the flooring out.

mcdermott top shop, counter, home depot, recycled glass counter, recycled glass, bathroom reno, bathroom redo, budget diy, diy, vanity, flooring, painting, flooring, tile, installation

mcdermott top shop, counter, home depot, recycled glass counter, recycled glass, bathroom reno, bathroom redo, budget diy, diy, vanity, flooring, painting, flooring, tile, installation

mcdermott top shop, counter, home depot, recycled glass counter, recycled glass, bathroom reno, bathroom redo, budget diy, diy, vanity, flooring, painting, flooring, tile, installation

bathroom, vanity, redo, reno, recycled glass counter, bathroom vanity, bathroom counter, home depot, menards, knobs, tile, lowes, flooring, homelux, underlayment, before and after, before, after

Obviously at some point during the life of this bathroom there was some leaking issues.

bathroom, vanity, redo, reno, recycled glass counter, bathroom vanity, bathroom counter, home depot, menards, knobs, tile, lowes, flooring, homelux, underlayment, before and after, before, after

mcdermott top shop, counter, home depot, recycled glass counter, recycled glass, bathroom reno, bathroom redo, budget diy, diy, vanity, flooring, painting, flooring, tile, installation

Since the distance between the current flooring and floor we have in the hallway wasn't enough to install cement board on the floor, we opted to go with this stuff:

It was kind of expensive, we had to purchase an entire roll, but comes with a lifetime warranty on leaking, and install was SO much easier then concrete board, so we opted to try it out and are impressed with it.

bathroom, vanity, redo, reno, recycled glass counter, bathroom vanity, bathroom counter, home depot, menards, knobs, tile, lowes, flooring, homelux, underlayment, before and after, before, after

The hubby laid it out to size and cut it.  Per the instructions he then mixed up some mortar and adhered it between the underlayment and yellow flooring started out with.  The directions say you can start laying tile immediately, so that's what he did!

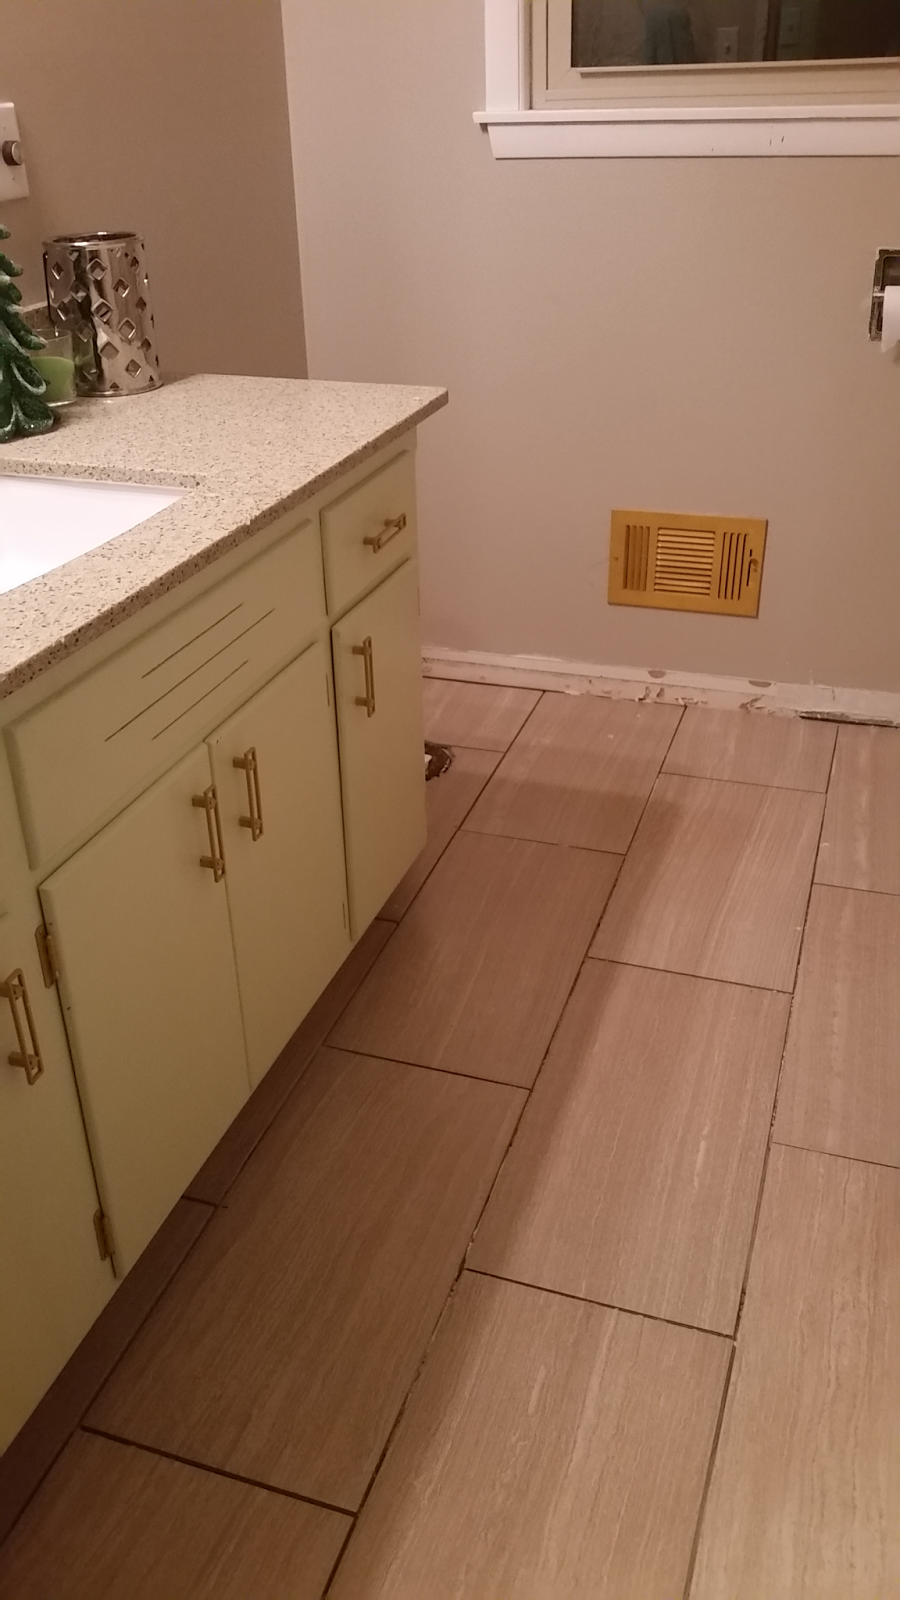
I love this tile, and slowly but surely we managed to get it done.

mcdermott top shop, counter, home depot, recycled glass counter, recycled glass, bathroom reno, bathroom redo, budget diy, diy, vanity, flooring, painting, flooring, tile, installation

mcdermott top shop, counter, home depot, recycled glass counter, recycled glass, bathroom reno, bathroom redo, budget diy, diy, vanity, flooring, painting, flooring, tile, installation

bathroom, vanity, redo, reno, recycled glass counter, bathroom vanity, bathroom counter, home depot, menards, knobs, tile, lowes, flooring, homelux, underlayment, before and after, before, after


bathroom, vanity, redo, reno, recycled glass counter, bathroom vanity, bathroom counter, home depot, menards, knobs, tile, lowes, flooring, homelux, underlayment, before and after, before, after


On a normal project, with normal time management and scheduling we would have had this floor down a lot quicker, but between the process of planning my frozen embryo transfer (here, here, here and here), a family emergency we were working through over the past couple of months, along with another bathroom project we took on, things  have been slightly delayed in the Emily and Chad household!

 But since I love before's and after's:


Before:

bathroom, vanity, redo, reno, recycled glass counter, bathroom vanity, bathroom counter, home depot, menards, knobs, tile, lowes, flooring, homelux, underlayment, before and after, before, after

After:

bathroom, vanity, redo, reno, recycled glass counter, bathroom vanity, bathroom counter, home depot, menards, knobs, tile, lowes, flooring, homelux, underlayment, before and after, before, after


What a difference a little paint, some tile and a new counter can do...Now onto the 1,000 other projects we have to get done while these twin boys are percolating....


Friday, September 11, 2015

Bathroom(s) Update(s)

Mission: "Spruce Up The Bathrooms" has begun:


First Bathroom:

I woke up one morning and decided to stain the vanity.  The hubs and I love how much storage space it gives, so we opted to save ourselves some money and keep it, but we were not a fan of the out-datedness of it. 

bathroom, vaniety, minwax, stain, elbow grease, polyshades, polyurethane, budget, project, before and after, world market, mirror, lighting

So this is where I came in.  After some elbow grease, a orb-sander, a few 60 grit sand paper sheets ,a lot of patience and some stain and spray paint we have this:

bathroom, vaniety, minwax, stain, elbow grease, polyshades, polyurethane, budget, project, before and after, world market, mirror, lighting

If you are looking to save money and want a drastic change, this is the project for you.  This project was $13.00 (spray paint and stain), which is a huge savings compared to the cost of a new vanity!

To get there I took the doors and drawers off and got to sanding.  (Heads-up this took a while at first, so that's why I eventually went to 60 grit and worked just fine).

bathroom, vaniety, minwax, stain, elbow grease, polyshades, polyurethane, budget, project, before and after, world market, mirror, lighting

bathroom, vaniety, minwax, stain, elbow grease, polyshades, polyurethane, budget, project, before and after, world market, mirror, lighting
 I took care of the doors outside and stained them in the garage.  You can use pretty much anything to apply the stain, I used a stain sponge.

bathroom, vaniety, minwax, stain, elbow grease, polyshades, polyurethane, budget, project, before and after, world market, mirror, lighting
 The stain I used was Minwax PolyShades Stain and Polyurethane combo in Mission Oak.

bathroom, vaniety, minwax, stain, elbow grease, polyshades, polyurethane, budget, project, before and after, world market, mirror, lighting

I used this stain, with polyurethane in it, which saved a lot of time and LOVE how closely it matches the blinds!

bathroom, vaniety, minwax, stain, elbow grease, polyshades, polyurethane, budget, project, before and after, world market, mirror, lighting

I also went ahead and painted all of the hardware on the vanity the same color as what I painted the vent (Rust-oleum Caterpillar Yellow).

bathroom, vaniety, minwax, stain, elbow grease, polyshades, polyurethane, budget, project, before and after, world market, mirror, lighting

bathroom, vaniety, minwax, stain, elbow grease, polyshades, polyurethane, budget, project, before and after, world market, mirror, lighting

I also went ahead and started to paint the trim around the window on the floors.  Definitely cleans things up if I say so myself!

bathroom, vaniety, minwax, stain, elbow grease, polyshades, polyurethane, budget, project, before and after, world market, mirror, lighting

We just need to switch up the vanity, the faucet and add a little tile and this bathroom will be in tip-top shape!
  
Second Bathroom:

This is our tiny half-bath.

bathroom, vaniety, minwax, stain, elbow grease, polyshades, polyurethane, budget, project, before and after, world market, mirror, lighting

This bathroom didn't really need a lot...it is small anyways. 

bathroom, vaniety, minwax, stain, elbow grease, polyshades, polyurethane, budget, project, before and after, world market, mirror, lighting

We switched out the light with this one, got our standard bamboo blinds from Overstock, slapped up a few coats of paint (Putty in My Hands),...

bathroom, vaniety, minwax, stain, elbow grease, polyshades, polyurethane, budget, project, before and after, world market, mirror, lighting

and I found this mirror from World Market and scooped it right up.  Since this bathroom doesn't really have any storage, the shelf helps a ton.

bathroom, vaniety, minwax, stain, elbow grease, polyshades, polyurethane, budget, project, before and after, world market, mirror, lighting

bathroom, vaniety, minwax, stain, elbow grease, polyshades, polyurethane, budget, project, before and after, world market, mirror, lighting

This room is pretty much done, we can add some spice with crown molding if we want, or wainscoting, but it all depends on how we are feeling.

bathroom, vaniety, minwax, stain, elbow grease, polyshades, polyurethane, budget, project, before and after, world market, mirror, lighting

 Any bathroom updates on a budget?