Showing posts with label Landscaping. Show all posts

Tuesday, September 8, 2015

Outside Updates

In the midst of our patio being done...

spirea, steins, planting, gardening, diy, landscaping, fieldstone, stone, field, free, grasses, burning bushes


and our yard looking like a bomb exploded on it...


spirea, steins, planting, gardening, diy, landscaping, fieldstone, stone, field, free, grasses, burning bushes

spirea, steins, planting, gardening, diy, landscaping, fieldstone, stone, field, free, grasses, burning bushes


We decided that we needed to add a little more cohesiveness, so we ordered mulch.

I measured, and figured out we needed about eight yards.

The hubby thought, the more the merrier, and added another EIGHT yards....making 16 yards TOTAL! (please excuse my oh so stylish outfit, I obviously didn't care and was covered in sweat and mulch)

spirea, steins, planting, gardening, diy, landscaping, fieldstone, stone, field, free, grasses, burning bushes, mulch, 16 yards, i'm on top of the world


Needless to say we were swimming in it, but on a positive note we won't have to mulch for the next couple years.

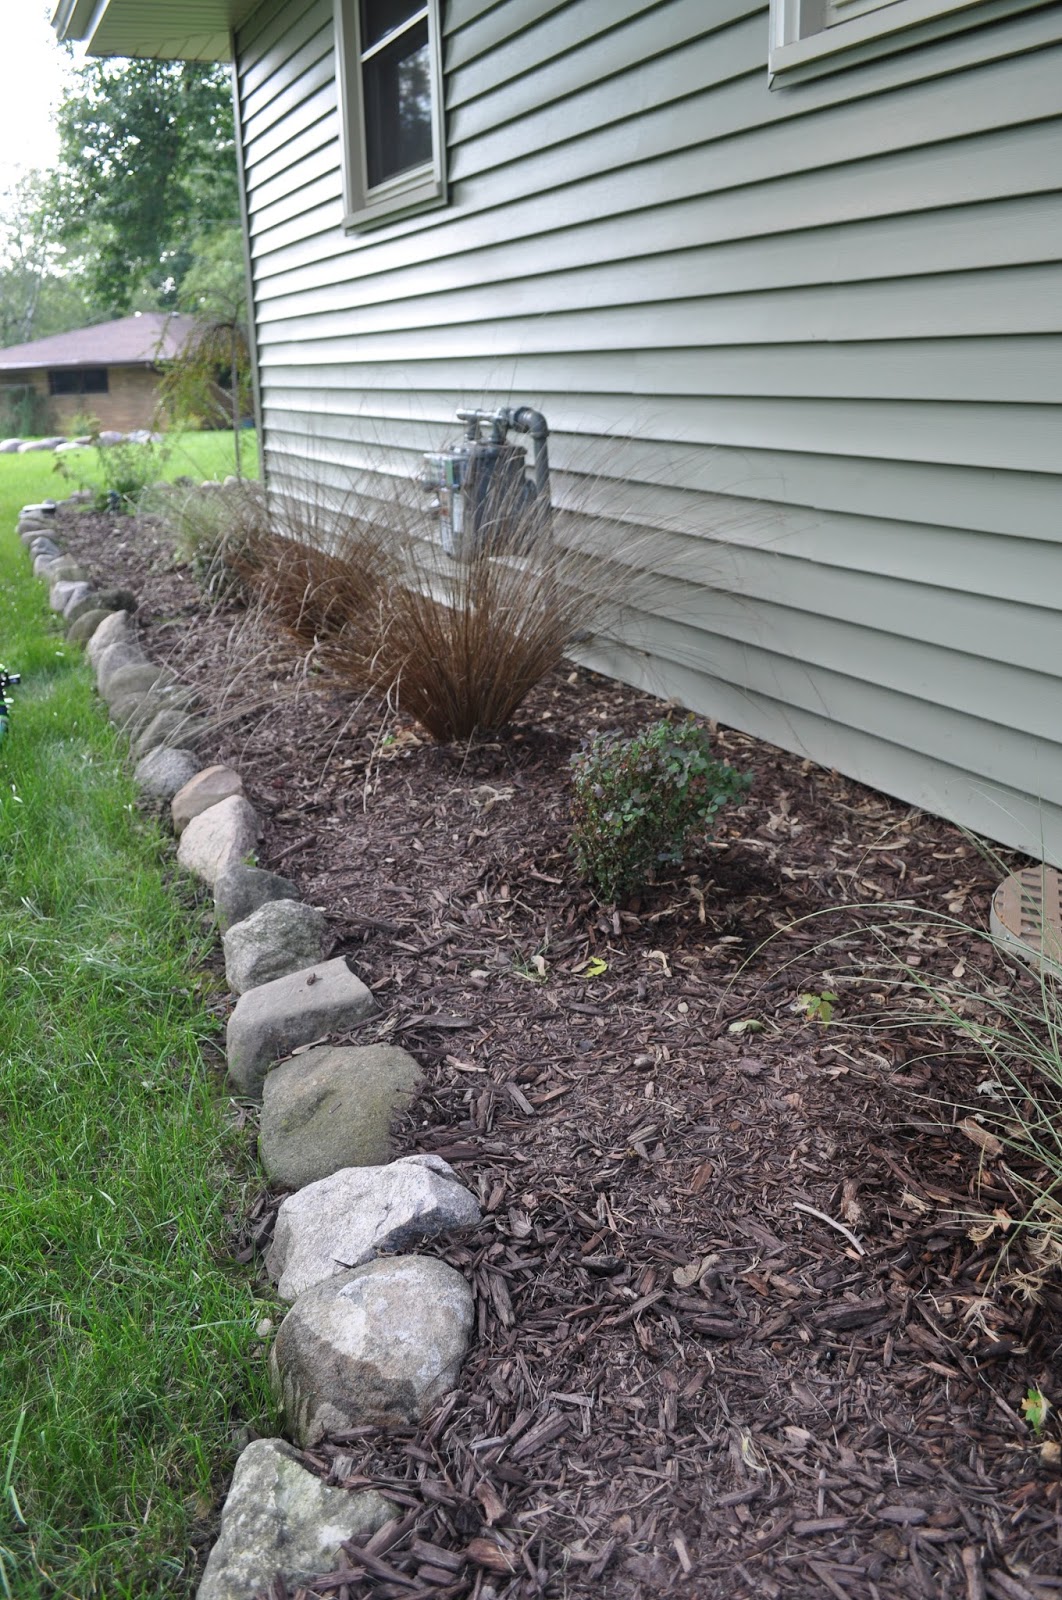
My dad had a field stone wall that he had replaced last year and gave Chad and I all of it to use for our landscaping.  I was not sure where we were going to use it, but knew that we would somehow.

We finally figured it out, bumped out all of the edging around the house and beefed things up with larger field stone we had stored behind our shed.

spirea, steins, planting, gardening, diy, landscaping, fieldstone, stone, field, free, grasses, burning bushes

spirea, steins, planting, gardening, diy, landscaping, fieldstone, stone, field, free, grasses, burning bushes, beefed out, mulch, weed barrier

spirea, steins, planting, gardening, diy, landscaping, fieldstone, stone, field, free, grasses, burning bushes, mulch, weed barrier, 16 yards, delivery

spirea, steins, planting, gardening, diy, landscaping, fieldstone, stone, field, free, grasses, burning bushes, mulch, delivery, diy
spirea, steins, planting, gardening, diy, landscaping, fieldstone, stone, field, free, grasses, burning bushes, perennials, mulch, 16 yards, delivery
We also planted a ton of perennials mostly, and opted to keep the bushes that were already established in the front. 

spirea, steins, planting, gardening, diy, landscaping, fieldstone, stone, field, free, grasses, burning bushes

spirea, steins, planting, gardening, diy, landscaping, fieldstone, stone, field, free, grasses, burning bushes

spirea, steins, planting, gardening, diy, landscaping, fieldstone, stone, field, free, grasses, burning bushes


spirea, steins, planting, gardening, diy, landscaping, fieldstone, stone, field, free, grasses, burning bushes

One trip left me with eight spireas that we planted on the edge of our property between our house and our neighbor to the west.  It's nothing against him, he's actually a pretty awesome neighbor, but we want our yard to feel a little more closed in. 

spirea, steins, planting, gardening, diy, landscaping


Now we just need a lot of water and a little patience...

spirea, steins, planting, gardening, diy, landscaping, fieldstone, stone, field, free, grasses, burning bushes


spirea, steins, planting, gardening, diy, landscaping, fieldstone, stone, field, free, grasses, burning bushes


spirea, steins, planting, gardening, diy, landscaping, fieldstone, stone, field, free, grasses, burning bushes


spirea, steins, planting, gardening, diy, landscaping, fieldstone, stone, field, free, grasses, burning bushes


spirea, steins, planting, gardening, diy, landscaping, fieldstone, stone, field, free, grasses, burning bushes


spirea, steins, planting, gardening, diy, landscaping, fieldstone, stone, field, free, grasses, burning bushes


spirea, steins, planting, gardening, diy, landscaping, fieldstone, stone, field, free, grasses, burning bushes


spirea, steins, planting, gardening, diy, landscaping, fieldstone, stone, field, free, grasses, burning bushes

Weeping Cranberry Cotoneaster  (we have named him "Berry")

spirea, steins, planting, gardening, diy, landscaping, fieldstone, stone, field, free, grasses, burning bushes

spirea, steins, planting, gardening, diy, landscaping, fieldstone, stone, field, free, grasses, burning bushes

spirea, steins, planting, gardening, diy, landscaping, fieldstone, stone, field, free, grasses, burning bushes


and pots...who doesn't love to add a little color with annuals...

spirea, steins, planting, gardening, diy, landscaping, fieldstone, stone, field, free, grasses, burning bushes, home depot


spirea, steins, planting, gardening, diy, landscaping, fieldstone, stone, field, free, grasses, burning bushes, plant land, cerveza and lime


spirea, steins, planting, gardening, diy, landscaping, fieldstone, stone, field, free, grasses, burning bushes


Tuesday, August 25, 2015

Window Well Planter Box

When we had our patio poured we had a window well removed to make room for the *future* sliding door we want to install off of our kitchen.  Rather than throwing it out, I had this grand idea to turn it into a planter box and attach it to our shed.  Needless to say, this project was free and I love how I was able to up-cycle something and add a little character to our shed area.

We secured it to the shed with a few screws.

window well, landscaping, planter, planter box, box, outside, diy, spring, summer, flowres, impatiens

Obviously the window well was deep, and frankly I didn't want to spend a small fortune on dirt to fill it up, so I used empty plastic pots that I had left over after planning my yearly plants to take up some space and filled the remaining area with Miracle Grow dirt.

window well, landscaping, planter, planter box, box, outside, diy, spring, summer, flowres, impatiens, blue, blue flamingos, flamingos

I then loaded it up with impatiens, watered generously and watched them grow!  The area is so shady, so this is the perfect plant!

window well, landscaping, planter, planter box, box, outside, diy, spring, summer, flowres, impatiens

I love how this turned out, love how inexpensive (free) it was and LOVE reusing things in a creative way! What kind of unique things have you used for landscaping?? I'd love to hear!

Monday, September 15, 2014

DIY Window Well Covers

Our dog loves frogs.  Tiny ones, larger ones, bright green, dark green.  She is obsessed.  For weeks she would stalk the side of our house, looking in every window well for the frogs that likes to sit in them.  Most of the time they were filled with old leaves that if they moved June bug thought they were frogs. 
 
There was one night we had a bon fire and we had her outside.  Well, she would not leave this one frog alone that was trapped in our window well.  I told June to leave the frog alone.  By the way did I mention she is GREAT at listening. (NOT!!)  Well about five minutes after telling her to stay away from the window well, she was running from it, with a frog leg flopping out of her mouth.  Disgusting to say the least and we never found the body. 
 
That night was the last straw for us.  The next morning we went to Home Depot, Menards and Lowes looking for window well covers.  They all carried two similar styles.
 
home depot, window well cover, window well covers
 
OR

home depot, window well covers, window well cover
 
Frankly for our situation, with a VERY motivated springer spaniel, we knew that neither would do the trick.  The last thing we need is for June to be able to see into the window well, she would probably end up breaking the cover.  The blue ones weren't terrible, but they did not have the size that we needed.  Instead we took things into our own hands and DIY'd some of our own and LOVE the way they turned out!
 
siding, window well covers, window well cover, diy, vinyl lattice, lattice, plywood, screws, frogs, june bug
 
Here is what you will need if you want to tackle this:
  • 3/4 inch plywood
  • Vinyl lattice
  • Polyurethane
  • Screws
  • Siding
 
The hubs measured each window well and transferred that to a piece of plywood.  From there he cut out each one, and penciled in for the interior cut.  After he was done with both this is what he was left with.
 
After each one was cut I went and applied a few coats of polyurethane to them.  As you can tell the left one isn't and the right one is.  This will hopefully keep them going strong through all the beautiful weather Wisconsin gets throughout the year. 
 
siding, window well covers, window well cover, diy, vinyl lattice, lattice, plywood, screws, frogs, june bug


Once they were dry, or almost dry, the hubs took the plexi glass that we purchased and cut out an identical piece to match the ply wood (without cutting out the middle). 

siding, window well covers, window well cover, diy, vinyl lattice, lattice, plywood, screws, frogs, june bug


After the plexi glass was sitting on the frame, the hubs took the vinyl lattice and cut it out to match.

siding, window well covers, window well cover, diy, vinyl lattice, lattice, plywood, screws, frogs, june bug, plexi glass

He then pre-drilled holes (so the plexi glass wouldn't crack) and screwed the lattice and plexi glass into the plywood and bam, we had custom, DIY window well covers.

We did run into a predicament when we placed the window well cover on.  June came over, sniffed it and nudged it off.  Fail.

siding, window well covers, window well cover, diy, vinyl lattice, lattice, plywood, screws, frogs, june bug

The hubs had a brought this project to a whole different level of custom when he grabbed some of the extra siding that was laying around in the basement and cut strips and screwed them into the plywood.

siding, window well covers, window well cover, diy, vinyl lattice, lattice, plywood, screws, frogs, june bug

We had Project: DIY Window Well Cover completed and June bug, although she was a little upset about losing her areas to snoop around in for frogs, she has survived, and no other frogs have perished.  The frogs can thank us!
 
siding, window well covers, window well cover, diy, vinyl lattice, lattice, plywood, screws, frogs, june bug

Monday, August 18, 2014

Seriously A Hose Reel?

Usually the hose ends up spooled on the ground, or laying in the middle of the yard, or just tossed on the side of the house. So, every spring/summer for the past FIVE years, EVERY SINGLE TIME the hubs and I venture out looking for a hose reel we end up coming home empty handed and beyond mad at each other.

There really aren't many options out there....

There was this one.  We opted out of this one because we thought it might slide around too much in the ground and eventually fall or lean to one side or the other.

hose reel, hose, outside, landscaping, watering, dilemma, second house, diy, menards

Then there was this one.  I really loved it, but I believe it was almost $100.  It was heavy duty and seemed like it would have done the job, but nope. Not going to happen.

hose reel, hose, outside, landscaping, watering, dilemma, second house, diy, menards

Then the usual.  The hide away hose reel.  It wasn't terrible, but most of the parts were made of plastic and we didn't think it would hold up.  There are always return policies, but we always lose our receipts, forget where we bought it and say "screw it" when it comes to dealing with bringing it back.

hose reel, hose, outside, landscaping, watering, dilemma, second house, diy, menards

There were a few others, but these are the usual three that we see EVERY year.

This is usually how it goes for our hose reel hunting process:

  • Spring comes around, the hubs and I get the itch to want to clean out the outside.  Obviously we have forgotten about the previous year.
  • Out comes all of the pots, patio table, chairs, cushions and the hose.
  • We realize there isn't anything to hang the hose from so it looks sloppy on the side of the house.
  • Off to the store we go, eagerly hoping to find something that will work perfect.
  • Once inside the store, the hubs and I approach the hose/hose reel section and take in everything.
  • I choose a hose reel that will most likely work, hide everything and say, "hey what about this one?"
  • Hubs knocks it down. "Nope, that's not going to work."
  • Then he's like, "how about THIS one?"
  • I knock it down and say, "Seriously, $100 for a stupid piece of equipment to hold a hose. Absolutely NOT!"
  • After going through EVERY hose reel in stock, slowly getting MORE and MORE frustrated, I march out of the area, annoyed and frustrated.
  • We go home, and the hose lays either in the yard or on the side of the house all season.
  • Rinse and repeat next year.

This year after going through almost all the steps above, I found one.  Its not a crank reel, no wheels on it, and it wasn't terribly priced.  The hubs and I were tossing different ones back and forth and he wasn't a huge fan of it, but I was so over doing this every year that I put it in the cart and we managed to not kill each other and we left the store.

So after FIVE stinkin' years of searching, we ended up with this:

hose reel, hose, outside, landscaping, watering, dilemma, second house, diy, menards


hose reel, hose, outside, landscaping, watering, dilemma, second house, diy, menards


hose reel, hose, outside, landscaping, watering, dilemma, second house, diy, menards

I know, fancy right?  It's plain, simple, and works for the front of our house.  Eventually, at some point when we change the landscaping around that one might bite the dust, but for now I'm happy that we don't have to struggle with dragging the hose out from behind the bushes.

Funny thing is I brought up this struggle with my mom and she said that she's been having issues finding a decent one too.  Anyone else?

Monday, June 30, 2014

Field Stone Fire Pit

Who doesn't love a good ol' bon fire? Sitting around one with good friends is what summer and fall nights are made of! Besides painting and moving in, one of the first projects we wanted to get done was to have a fire pit. We had one at our old house, and it did the job but it was small, so this time around we figure "go big or go home". We love how it turned out. Low maintenance, as in if a rock cracks we just replace it. Done.


This project was easy, almost too easy, just place some field stone around in a circle and call it a day. The idea of having a fire pit was the ONLY easy thing. We got a bunch of field stone from my dad that he had, got it delivered and thought it wouldn't be that difficult to move them. No. To move the 10 or 11 stones took us forever. One. At. A. Time. With a wheel barrel. And both of us pulling it completely around the house to the backyard. You may be wondering why we didn't have the stone brought to the back? We've had so much rain around these parts the truck probably would have sunk right in.

Before cutting anything out, we stuck a metal rod into the ground, attached some twine and used the marking spray paint and walked around the metal rod to make a circle.


From there we painstakingly placed all the stones and figured out placement, the hubs edges around the outside of the stones so he knew how far to cut out the grass.  He rolled the rocks out and the hubs cut out the rest of the grass.


When he was done with that, stones went back in and we called it a day.


Funny thing is we were in such a rush to get this done because we were having a party the next day. Did we use the fire pit? Nope. Everyone was either inside the house or hanging in the garage. 

Go figure, but we are excited that we got it done!